
A Door Frame Metal Detector looks like a simple arch. Walk through, it beeps or it doesn’t. But inside that frame are eight distinct components — each with its own failure mode, maintenance schedule, and replacement cost.
Security teams that don’t understand these parts treat every DFMD problem the same way: call the vendor. The result is unnecessary downtime, inflated service bills, and security gaps that last days.
This guide covers every major component inside a DFMD, what each one does, how it fails, and exactly what your security team should be doing to maintain it — so you’re never caught off guard.
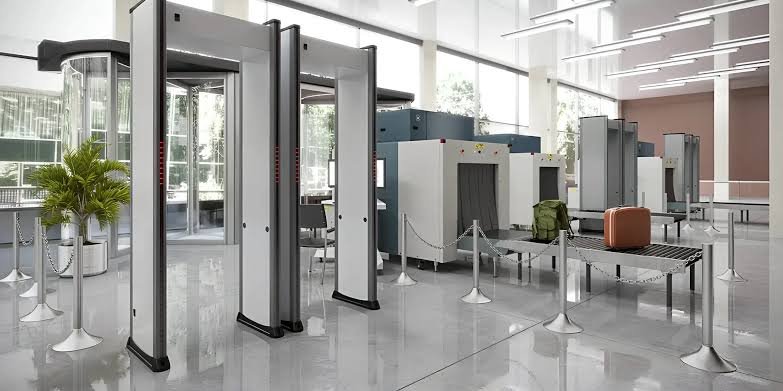
What Is a DFMD? Quick Overview
DFMD stands for Door Frame Metal Detector — a walk-through security screening device used at airports, government offices, courts, metro stations, malls, schools, and industrial facilities.
It detects metallic objects carried on a person’s body by generating an electromagnetic field between two panels. When metal disrupts that field, the detector triggers an alarm — audio, visual, or both.
Understanding the parts inside helps you: buy the right replacement, diagnose faults faster, negotiate AMC terms intelligently, and extend the operational life of your equipment.
DFMD: Complete Parts List and Functions
1. Transmitter Coil (TX Coil)
What it is: A coil of copper wire wound around a ferrite core, embedded inside one of the two vertical panels (usually the left panel in most models).
What it does: Generates a continuous alternating electromagnetic field that passes through the walk-through zone. This is the detection engine of the entire unit — without a functioning TX coil, the DFMD cannot detect anything.
How it fails:
- Wire breakage from physical impact (someone hits the panel)
- Insulation degradation in high-humidity environments
- Overheating if the unit runs 24/7 without adequate ventilation
- Winding short-circuit from moisture ingress
Signs of TX coil failure: DFMD powers on but detects nothing — even a large metal object carried through triggers no alarm. Sensitivity is at maximum but still no response.
Maintenance: No regular user maintenance needed. Inspect the panel exterior for cracks or dents that could indicate internal damage. Ensure the panel is not placed in direct water exposure. TX coil replacement requires a technician — typically ₹2,000 – ₹6,000 for the part plus labour.
2. Receiver Coil (RX Coil)
What it is: A second coil embedded in the opposite panel (right panel), tuned to detect disturbances in the electromagnetic field created by the TX coil.
What it does: Constantly monitors the field coming from the TX coil. When a metal object disrupts that field, the RX coil senses the change and sends a signal to the controller board to trigger an alarm.
How it fails:
- Same failure modes as TX coil — breakage, moisture, overheating
- De-tuning over time — the coil’s resonant frequency drifts, reducing sensitivity at certain frequencies (affects detection of specific metals)
- Cable connection loosening at the coil-to-PCB junction
Signs of RX coil failure: Inconsistent detection — DFMD sometimes detects the same object and sometimes doesn’t. False negatives (misses real metal) are the most dangerous symptom.
Maintenance: Quarterly inspection of the panel-to-panel cable connections. Any exposed cable runs should be in conduit to prevent physical damage or pinching from foot traffic.
3. Main Control PCB (Printed Circuit Board)
What it is: The central processing board, typically mounted in the base or top housing of one panel. This is the brain of the DFMD.
What it does:
- Drives the transmitter coil at the correct frequency
- Processes the receiver coil signal
- Applies zone discrimination (determines which zone of the arch the metal was detected in)
- Controls alarm output (buzzer, LED, relay)
- Manages sensitivity settings
- Handles power regulation
How it fails:
- Capacitor failure (most common, especially in India due to voltage fluctuations)
- IC damage from power surges or lightning
- Solder joint cracking from thermal cycling (on/off every day for years)
- Moisture damage if the housing seal is compromised
- Component burn from running on incorrect voltage
Signs of PCB failure: DFMD powers on, display works, but alarms are erratic — either constant false alarms or complete failure to detect. Settings don’t save after power cycle. Display shows error codes.
Maintenance: Always use a voltage stabiliser or UPS — this single step prevents the majority of PCB failures in India. Keep the housing sealed. Never spray cleaning chemicals near the panel vents. PCB replacement is the most expensive repair: ₹4,000 – ₹18,000 depending on brand and model
4. Power Supply Unit (PSU)
What it is: A regulated power supply that converts 230V AC mains into the low DC voltages the PCB and components need (typically 12V DC, 5V DC).
What it does: Provides stable, regulated power to every component. Also acts as a buffer against mains voltage fluctuations — a quality PSU absorbs minor surges before they reach the PCB.
How it fails:
- Rectifier diode failure from sustained overvoltage
- Filter capacitor swelling/leakage (visible symptom — look for bulging tops on capacitors)
- Transformer burnout from extended overload
- Thermal failure in poorly ventilated enclosures
Signs of PSU failure: DFMD doesn’t power on despite correct mains connection. Powers on but shuts off after a few minutes (thermal cutoff activating). Display flickers or dims.
Maintenance: Visually inspect the PSU board annually (if your technician opens the housing). Check for swollen capacitors, burn marks, or heat discolouration. Ensure the housing ventilation slots are clear of dust. PSU replacement: ₹1,500 – ₹4,000.
5. Zone Detection System
What it is: In multi-zone DFMDs (5-zone, 18-zone, 33-zone models), multiple receiver coil segments or separate sensing circuits divide the arch height into discrete detection zones.
What it does: Instead of simply triggering an alarm when metal is detected anywhere, a zoned DFMD tells you exactly where on the body the metal is located. An 18-zone model, for example, can indicate whether the metal is at ankle level, waist level, or shoulder level — helping security staff direct further screening efficiently.
How it fails:
- Individual zone circuits losing calibration — one zone becomes hypersensitive (constant false alarms) while adjacent zones go blind
- Zone boundary overlap caused by coil positioning shift after panel impact
- Software/firmware bug causing zone display to freeze on one position
Signs of zone failure: Security display always shows the same zone regardless of where metal is carried. Or zone 3 constantly triggers even with no metal present.
Maintenance: Monthly test with a standard test piece (a small metal object of known size) carried at different heights. Each zone should trigger when and only when the test piece is at that height. Document results. Calibration drift requires vendor recalibration — not a user-level fix.
6. Alarm Output System (Buzzer + LED Array)
What it is: The output devices that communicate a detection event — an audio buzzer, a column of LED lights on the panel sides, and optionally a relay output for connecting to external systems (CCTV trigger, access control, etc.).
What it does:
- Audio alarm alerts the security officer immediately
- LED column shows which zone triggered — left panel, right panel, or both, at what height
- Relay output can trigger a camera to capture a snapshot, lock a door, or log the event in a security system
How it fails:
- Buzzer membrane fatigue — alarm becomes quieter over months and eventually inaudible in noisy environments
- LED burnout — individual LEDs die, leaving gaps in the zone display
- Relay contact oxidation — external trigger stops working even though DFMD detects correctly
Signs of output failure: Security officer says “the beep has gotten very soft.” Zone LEDs are partially lit. Connected camera no longer captures on detection. These failures are subtle and dangerous — the DFMD is detecting correctly but the operator isn’t being alerted properly.
Maintenance: Monthly audio test — stand at the operator position while a colleague walks through with metal. Can you clearly hear the alarm over ambient noise? If not, buzzer replacement (₹300 – ₹800) is cheap insurance. LED array inspection: look for dark patches in the zone display during a test walk-through.
7. Sensitivity and Settings Interface
What it is: The operator control panel — typically a keypad or touchscreen on the top housing, or a handheld remote in some models, used to adjust sensitivity, set zone thresholds, configure alarm modes, and access diagnostic information.
What it does: Allows your security supervisor to adjust detection sensitivity for different environments (a hospital may need lower sensitivity to avoid alarming hip replacement patients; a courthouse needs maximum sensitivity). Also provides access to event logs, alarm counts, and self-diagnostic data.
How it fails:
- Keypad membrane wear — buttons stop responding after years of use
- Settings not saving after power cycle (indicates PCB issue or settings memory chip failure)
- Password lockout if default password was changed and not documented
Maintenance: Document your DFMD settings (sensitivity level, zone thresholds, alarm mode) immediately after installation. Keep this in writing — not just in the device memory. If settings reset after every power cut, this is an early warning sign of PCB battery or memory chip failure.
8. Housing, Frame, and Connecting Cable
What it is: The physical structure — two vertical panels connected by a top arch, plus the cable running between the panels (carrying signal between TX and RX coils and powering one panel from the other’s PSU).
What it does: Provides structural rigidity, protects internal components from environment, and maintains the correct geometric relationship between the two panels (alignment is critical for proper detection).
How it fails:
- Panel misalignment from impact or installation on uneven floors — causes detection gaps or false alarms
- Inter-panel cable damage — most common in high-footfall locations where the cable runs along the floor
- Housing crack at cable entry point — allows moisture ingress
- Top arch loosening — reduces structural stability and can allow panel flex
Signs of housing/cable issues: One complete side stops alarming (cable break to that panel). DFMD performance changes after it was moved or repositioned. Alarm triggers based on walking position rather than metal carried.
Maintenance: Monthly visual inspection of the inter-panel cable — look for kinks, pinching under mats, or exposed copper. Keep the cable in a proper floor channel or conduit. Check panel alignment with a spirit level quarterly if the unit is in a high-traffic area. Tighten the top arch bolts annually.
DFMD Maintenance Schedule — For Security Managers
Most facilities run DFMDs until they fail, then panic. A structured maintenance schedule eliminates 80% of unplanned downtime.
Daily (Security Team)
- Power on test: walk through with a known metal object (coin or keys) — confirm alarm triggers
- Visual check: no physical damage, cable not pinched, panels standing vertical
- Audio check: alarm audible from operator position
- Zone display check: correct zone lights up during test walk-through
- Log any anomalies in the security register
Weekly (Security Supervisor)
- Clean panel exterior with dry cloth — do not use liquid cleaners near vents
- Check the floor area for moisture accumulation around base of panels
- Test all alarm modes (if your model has multiple — continuous tone, pulse, silent relay)
- Confirm relay output is triggering connected systems (CCTV, door lock) correctly
- Check sensitivity setting hasn’t been changed unauthorised
Monthly (Security Supervisor + Maintenance Staff)
- Full zone test: carry test piece at ankle / knee / waist / chest / shoulder height — all zones should respond correctly
- Inspect inter-panel cable full length
- Clean dust from housing vents using compressed air (brief burst from 6 inches away)
- Check for LED burnout in zone display
- Verify buzzer volume — no degradation from last month
- Check power supply connection and voltage stability reading
Quarterly (Vendor / AMC Technician)
- Open housing and inspect PCB visually — look for swollen capacitors, burn marks
- Check TX/RX coil connections at PCB terminals
- Re-calibrate zone boundaries if test walk-through shows drift
- Test relay output voltage and contact resistance
- Check PSU output voltages against specification
- Tighten all internal connector plugs (vibration loosens them over months)
- Update firmware if manufacturer has released updates
Annual (Full Service)
- Complete disassembly and cleaning of internal components
- Replace electrolytic capacitors in PSU (preventive — they degrade over 3–5 years)
- Replace buzzer if volume has dropped measurably
- Replace any burnt or dim LEDs in zone array
- Full sensitivity recalibration against standard test pieces
- Inspect and replace inter-panel cable if there is any visible wear
- Document all settings, parts replaced, and technician findings
Common DFMD Faults and Field Diagnosis
| Symptom | Most Likely Cause | Field Action |
|---|---|---|
| No power at all | PSU failure, blown fuse, or mains issue | Check mains socket first, then fuse in base housing |
| Powers on, detects nothing | TX coil failure or severe PCB fault | Call technician — not user-serviceable |
| Constant false alarms | External interference or sensitivity too high | Check for nearby electrical equipment; reduce sensitivity one step |
| Detects inconsistently | RX coil fault or loose inter-panel cable | Check cable connection; call technician if cable fine |
| One side not alarming | Inter-panel cable break | Inspect cable; avoid moving unit until repaired |
| Alarm very quiet | Buzzer membrane wear | Replace buzzer — low cost, high impact |
| Zone display wrong | Zone calibration drift | Call vendor for recalibration |
| Settings reset daily | PCB memory battery dead | PCB service required |
| Alarming near doorframes | Panel misaligned or interference from door hardware | Re-position panels; increase distance from metal frame |
DFMD Parts Replacement Cost in India (2026)
| Component | Replacement Cost | Frequency |
|---|---|---|
| Buzzer | ₹300 – ₹800 | Every 2–3 years |
| LED array (full) | ₹600 – ₹1,500 | Every 3–5 years |
| Inter-panel cable | ₹800 – ₹2,000 | Every 3–4 years (high traffic) |
| Power Supply Unit | ₹1,500 – ₹4,000 | Every 4–6 years |
| TX / RX Coil | ₹2,000 – ₹6,000 | Every 5–8 years |
| Main Control PCB | ₹4,000 – ₹18,000 | Every 7–10 years |
| Full unit replacement | ₹35,000 – ₹1,50,000 | Every 10–15 years |
💡 AMC tip: A good AMC covers all parts except the PCB (which vendors often exclude due to cost). Negotiate PCB coverage separately or ensure your AMC includes a PCB discount clause.
How to Extend DFMD Life — 5 Practical Tips
1. Always use a voltage stabiliser
Power fluctuations are the single biggest killer of DFMD PCBs in India. A ₹2,000 stabiliser can protect a ₹60,000 unit for years.
2. Never install directly on a wet floor
Moisture wicks up through the base housing and corrodes internal connections. Use a rubber base mat and ensure the installation area has proper drainage.
3. Don’t reposition without re-levelling
Every time a DFMD is moved, it needs to be re-levelled and the inter-panel cable re-routed cleanly. Quick repositioning without these steps causes alignment drift and cable damage.
4. Keep a maintenance log
A written record of every fault, repair, and setting change makes fault diagnosis faster and gives you data to decide when replacement is more economical than repair.
5. Train security staff on daily checks
A ₹10 coin walk-through test every morning takes 30 seconds and catches the majority of detection failures before they become security incidents.
Frequently Asked Questions
DFMD stands for Door Frame Metal Detector — a walk-through security screening arch used at building entrances to detect metal objects.
A standard DFMD has 8 major component systems: transmitter coil, receiver coil, main control PCB, power supply unit, zone detection system, alarm output (buzzer + LEDs + relay), settings interface, and the housing/frame/cable assembly. Each contains multiple sub-components.
Q: Which DFMD part fails most often in India?
A: The PCB capacitors and buzzer are the most frequent failures — capacitors due to voltage fluctuations, buzzer due to continuous operation. Both are preventable or inexpensive to replace when caught early.
Q: Can I replace DFMD parts myself?
A: Buzzer and LED replacements are sometimes doable for trained security maintenance staff. PCB, coil, and PSU work should always be done by a certified technician — incorrect replacement can create a non-detecting unit that appears to work normally, which is a serious security risk.
Q: How long does a DFMD last?
A: A quality DFMD from a reputable brand, properly maintained with annual servicing, lasts 10–15 years. Without maintenance, common failure occurs at 3–5 years.
Q: What is the difference between DFMD and HHMD?
A: DFMD (Door Frame Metal Detector) is a walk-through arch. HHMD (Hand Held Metal Detector) is a portable wand used by security staff for secondary screening. They work on the same electromagnetic principle but are used differently — DFMD screens everyone automatically, HHMD is used to pinpoint where metal is located after DFMD triggers.
Q: How often should DFMD sensitivity be calibrated?
A: Sensitivity should be checked monthly with a standard test piece and professionally calibrated quarterly. Recalibration is also needed after any physical repositioning, component replacement, or environmental change (new metal structures nearby, changed flooring).
Raise Solutions — DFMD Supply, Installation & AMC
Raise Solutions is an ISO-certified security equipment company serving government offices, factories, malls, schools, and corporate campuses across Andhra Pradesh, Telangana, and beyond.
Our DFMD services include:
- Supply of single-zone to 33-zone DFMDs
- Professional installation and commissioning
- Operator training for security staff
- Annual Maintenance Contracts (parts + labour)
- Emergency breakdown support
📞 Call for a free consultation
📍 Vijayawada | Hyderabad | Bangalore | Pune | Mumbai
🌐 raisesolutions.in